Register your Mobile Tracker Device with MAP using Sample Apps
Start Tracking
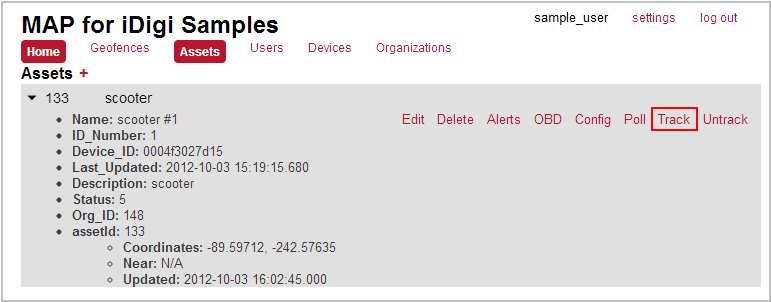
This sends the asset configuration you created within the Create Asset Configuration section out to the mobile tracker device and enables the features specified in the configuration.
For this example, the Location Tracking feature will be enabled as it was configured in the Create Asset Configuration section.
- With the asset's contents expanded; click the Track menu. This will instruct the mobile tracker device to start tracking and sending reports up to MAP.
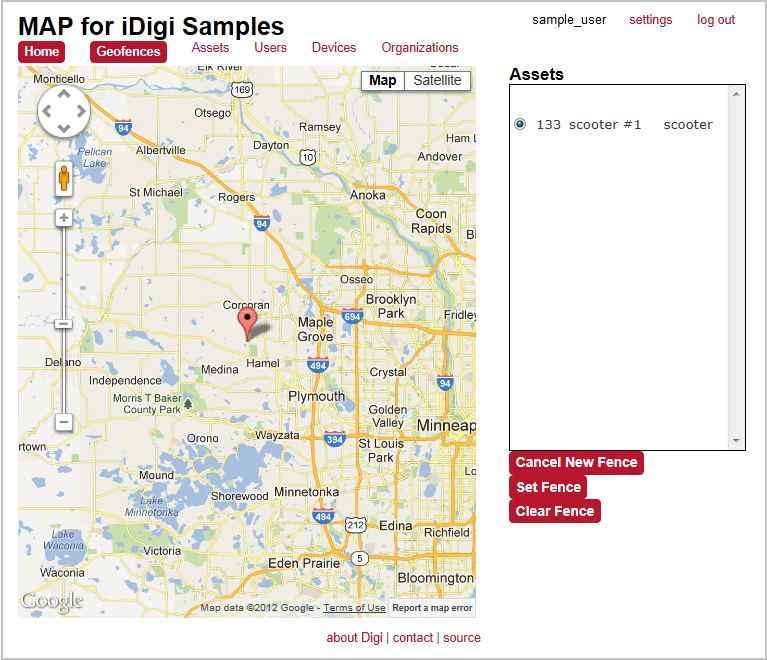
- Give your device some time to send reports up to MAP and then select the Geofences option within the toolbar; the Geofences page will be displayed. Ensure that your asset is selected from the list.
- The Geofences page displays location information for each of your configured asset objects. A pin will be displayed on the map (as shown below) indicating the current location of your selected asset object.
You've completed the process of registering your mobile tracker device with MAP. Next you can proceed to the What's Next? section to explore additional MAP resources, or configure a geofence for your asset (below).
Configure a Geofence
Optionally, you can configure a geofence within the Geofences page. This geofence will be a virtual perimeter in which your asset can travel.
To configure a geofence for your asset:
- Ensure that your asset is selected within the Assets pane of the Geofences page. For this example the "133 scooter #1" asset has been selected.
- Click once on the map in the desired starting location for your geofence; this will establish the first point within your geofence.
A blue pin will be displayed on the map.
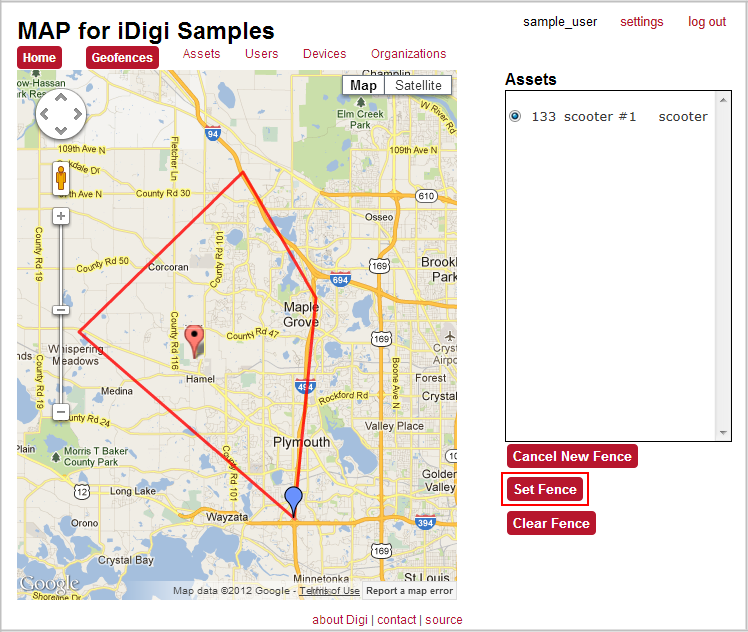
- Continue to select points on the map until you have outlined the desired perimeter for your geofence. This perimeter indicates the area in which your asset is allowed to travel.
- If you aren't satisfied with your selected perimeter, clicking the Clear Fence button
 will clear your perimeter and allow you to start over. will clear your perimeter and allow you to start over.
- Clicking the Cancel New Fence button
 will cancel the geofence entirely. will cancel the geofence entirely.
- When you are satisfied with your geofence perimeter, click the Set Fence button
 to save your configured geofence. to save your configured geofence.
You've completed the process of configuring a geofence. Proceed to the What's Next? section to explore additional MAP resources.
Back to Step 3 | Move to What's Next
|